
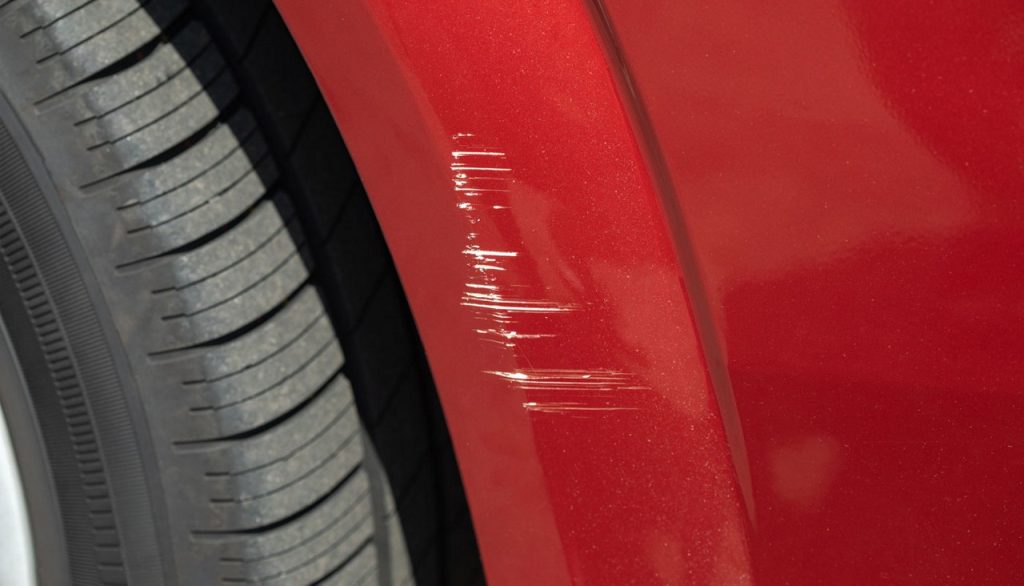
When it comes to learning how to fix a scratch on your car and achieving a professional finish, aerosol primer, basecoat-clearcoat and 2K paint systems are a game‑changer. At Greymoon Automotive Paints, we provide high‑quality aerosol solutions that make DIY refinishing accessible without compromising on durability or shine. This guide walks you through the exact steps to prepare, paint, and protect your surface for a flawless result.
Choosing Between Basecoat-clearcoat and 2K Paint
When repairing a scratch on your car, it’s important to know whether your vehicle requires basecoat paint or 2K paint.
- Basecoat paints are easier to blend into existing paintwork, making them ideal for spot repairs. They also deliver a higher shine and depth of finish once sealed with clear coat.
- Solid colours (non‑metallic) may only need a 2K paint aerosol, depending on the finish and level of difficulty required.
- Solid colours may be purchased in a basecoat, but remember to add a clear coat to your cart.
- Metallic colours (like silver) always require a basecoat plus clear coat. These paints have a pearl (glitter or sparkle) effect that needs a clear layer to lock in shine and durability.
This distinction ensures your repair blends seamlessly with the rest of the vehicle and maintains a professional finish.
Remember: Matching paint off a code is not always 100% accurate. For a perfect match, we recommend providing a physical sample of your car, such as the petrol cap, to ensure precision.
Tools & Materials You’ll Need
Before starting, you will need the following essentials:
- Befar plastic putty applicator
- Befar water paper hand sanding block, soft orange reccomended
- Pre-taped masking film
- Masking tape, 24mm reccommended
- 770 Antisil Degreaser Aerosol or 1L / Benzine
- P320 Spray Guard waterpaper
- F220 Bodyfine Fine Filler
- P800 Spray Guard waterpaper
- P303 Spot Repair Primer Aerosol
- Aerosol Paint – Options:
- 2K aerosol paint
- Basecoat & 2K Clear Coat
- A bucket with water and sunlight mixture (to keep sandpaper wet)
Step by step guide to repair and paint your scratch:
Step 1: Preparing the Panel
- When repairing a scratch, it’s not enough to only prep the immediate damaged spot. In order to achieve a seamless blend, you’ll need to prepare approximately ¼ to ½ of the panel, depending on the size of the panel and the scratch. Consequently, this ensures the new paint transitions smoothly into the existing finish without leaving visible edges.
- Equally important is masking off the surrounding area. Use the pre-taped masking film and masking tape to protect adjacent panels, trims, and surfaces from overspray. As a result, proper masking keeps your repair clean and professional, while prepping a larger section of the panel allows the paint to blend naturally into the original finish.
Step 2: Surface Preparation
- Preparation is the foundation of a perfect finish.
- Firstly, dip your waterpaper in the water/sunlight mixture to keep it wet.
- Then, flat the surface and area surrounding the scratch with P800 waterpaper to remove the shine from the existing clear coat for the new paint to adhere.
- Next, wipe and clean/degrease your panel with 770 Antisil Degreaser / Benzine.
- Afterward, apply thin layers (maximum 2mm thick) of F220 Bodyfine until the area is evenly covered. Remember: Mix 2-3% of hardener with the F220 Bodyfine before applying.
- Finally, sand the filler using P320 waterpaper. As a result, the surface will be smooth and ready for primer.
Step 3: Applying Primer
Begin with wiping and cleaning/degreasing your panel with 770 Antisil Degreaser / Benzine.
Next, spray 2 – 3 layers of P303 Sport Repair Primer, with a drying time of 5-10 minutes @23° in between each layer.
- Let the last layer of primer dry properly, about 45min – 1 hour @23°
- Make sure the surface is firm and properly cured.
- After the primer is dry, lightly flat the primer with P800 waterpaper.
- At this stage, your surface is smooth, sealed, and ready for paint.
Step 4: Painting
Option 1 – 2K Paint
The 2K Paint provides the color and aesthetic appeal.
Always wipe and clean/degrease your panel with 770 Antisil Degreaser / Benzine before painting the 2K Paint.
- Apply 3 layers of 2K aerosol paint, with a drying time of 15-20 minutes @23° in between each layer. This will allow each layer to become slightly tacky before applying the next.
- Do not wait until the coat is fully dry, tackiness ensures proper bonding.
After the third layer, wait at least a day before polishing, this will ensure that the paint is fully dried.
Option 2 – Basecoat Paint
The basecoat provides the colour.
Always wipe and clean/degrease your panel with 770 Antisil Degreaser / Benzine before painting the basecoat.
- Apply 3 layers of basecoat aerosol paint, with a drying time of 15-20 minutes @23° in between each layer. This will allow each layer to become slightly tacky before applying the next.
- Do not wait until the coat is fully dry, tackiness ensures proper bonding.
After the third layer, wait 20-25 minutes @23° until the paint is dry to the touch.
The clear coat is what gives your paint job its gloss, depth, and long‑lasting protection.
- Apply 3 layers of 2K clear coat aerosol, following the same tacky‑layer method as the basecoat.
- This step locks in the color and shields against UV rays, scratches, and weather damage.
Important Note: Drying & Curing
Patience is key.
- Allow the painted surface to dry for at least a full day.
- Avoid touching or exposing it to harsh conditions during this period.
- Once cured, your finish will be smooth, glossy, and durable.
- You are now able to flat and polish the area if neccesary.
Pro Tips for Best Results
When learning how to fix a scratch on your car, following these pro tips will help you achieve a professional finish:
- Always work in a well‑ventilated area.
- It is recommended not to work under a tree, as dust and debris could cause contamination to the work surface.
- Always wipe and clean/degrease your panel with 770 Antisil Degreaser / Benzine before applying filler, primer and paint.
- Shake aerosol cans thoroughly before use, about 5 minutes.
- Maintain consistent spray distance (20 – 30 cm).
- Use light, even passes to avoid drips & runs
Why Choose Greymoon Automotive Paints?
At Greymoon Online, we specialize in premium automotive refinishing products designed for both professionals and DIY enthusiasts. Whether you’re just starting out and learning how to fix a scratch on your car, or you’re a seasoned professional working on advanced refinishing projects, our aerosol paint systems deliver:
- Professional quality finishes
- Ease of use for beginners
- Durability and protection against everyday wear
With the right preparation and technique, you can achieve a showroom‑quality finish at home. Whether you’re restoring a classic or refreshing your daily driver, this guide on how to fix a scratch on your car ensures you get professional results. At Greymoon Automotive Paints we have the products and expertise to help you succeed.
For any queries or more information, contact us on WhatsApp 082 956 3184 or email orders@greymoonworx.co.za
